Setting Up Visual Studio Community
Visual Studio Community Edition is the simplest way to get started building programs with C++ on Windows. VS Community Edition is not to be mixed up with Microsoft's Visual Studio Code product. Visual Studio can be downloaded from the Microsoft website here.
Upon opening the installer, you should see a window that looks like this:
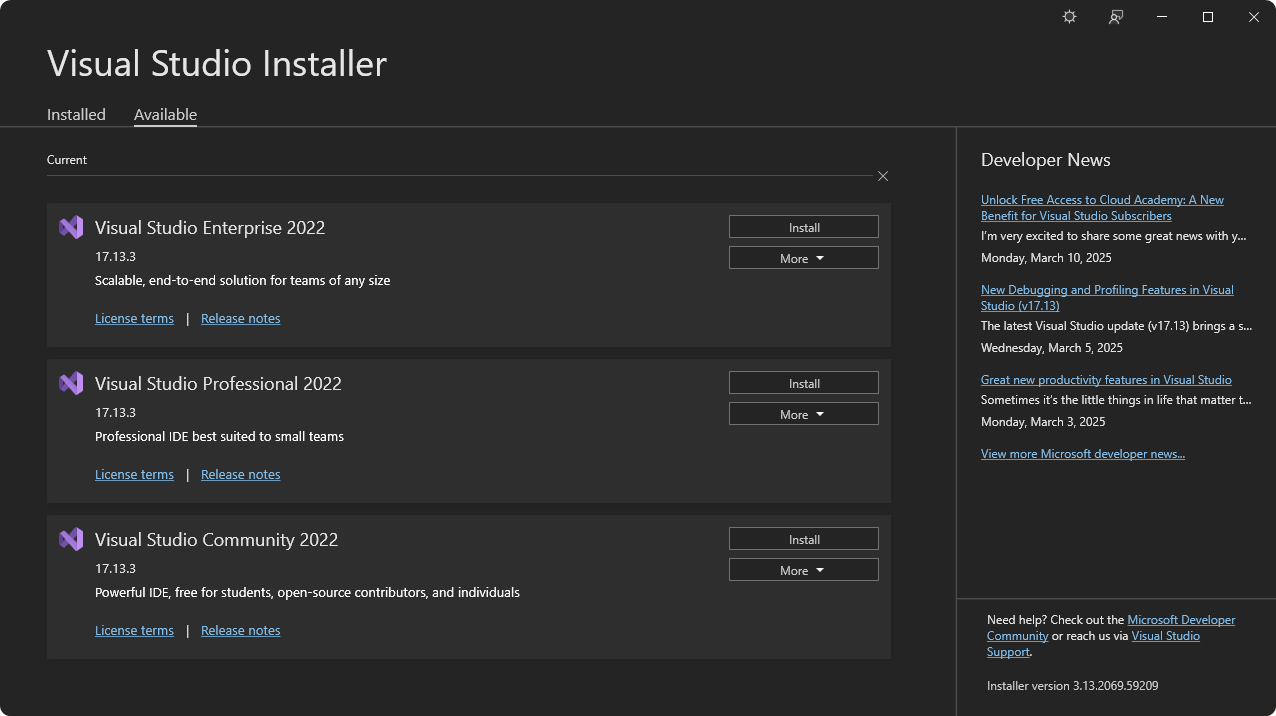
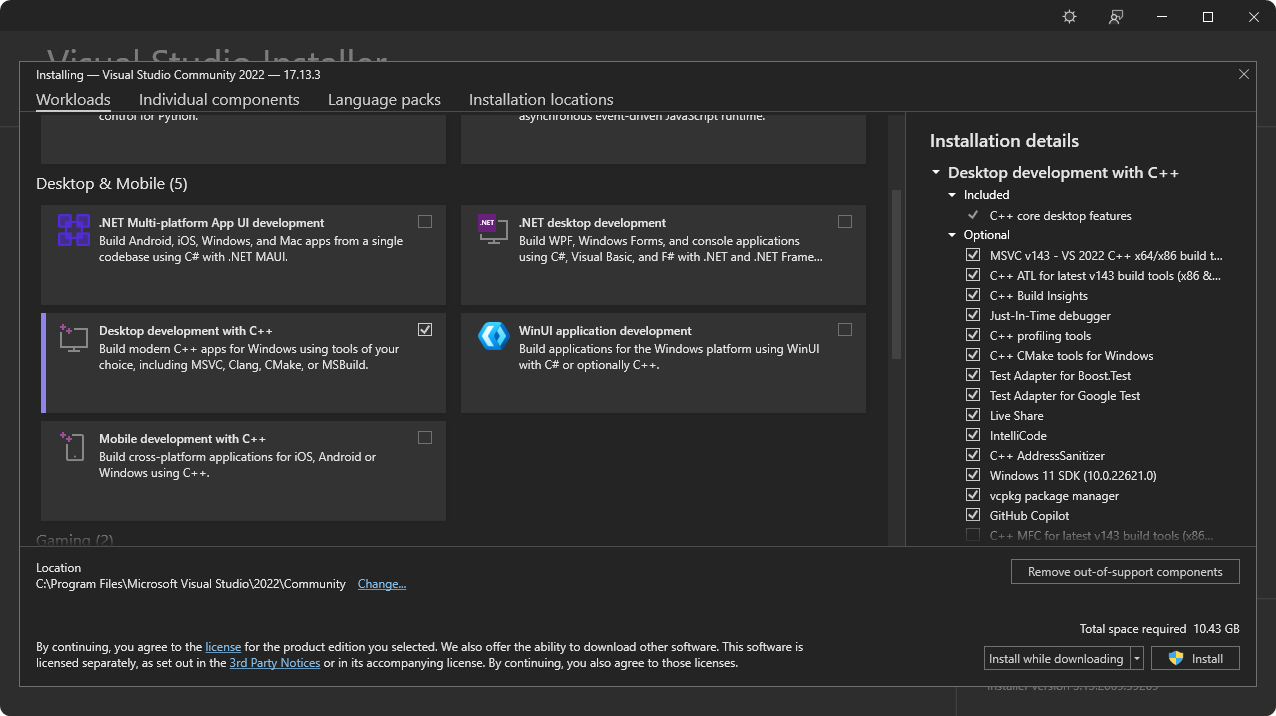
Click the "Install" button for Visual Studio Community 2022. Ensure that you have selected the Community edition, as the other versions are paid tools. A window will should appear with various options to select. Select "Desktop development with C++" under the "Desktop & Mobile" section and then click "Install".
Once the installer has completed, close the installer and optionally restart your computer. Once completed, open Visual Studio 2022. You should see a window which lists anything you've opened recently in Visual Studio and a "Getting Started" pane. Underneath getting started, select "Create a new project".

Select "Empty Project" to create a new project with no files at all. This will bring up a screen where you can give your project a name and a location. Provide your project with any name of your choice somewhere on your computer that you will be able to find again and click "Create".
INFO
Visual Studio organizes code into a hierarchy. At the bottom level are projects. Projects contain all of the files that are needed to create an executable, a library of code, a website, etc. This includes code, but it can also include data files, images, and more. Solutions contain multiple projects and are a way to group projects together and provide more information for Visual Studio to be able to build your code.
Your first time opening a project or solution after installing (or updating) Visual Studio will make a "What's New?" window pop up. Close this window and the Copilot Chat window, neither will be needed.
INFO
If you want to look at "What's New?" later on, you can find this under the "Help" menu bar item.
Getting Started with C++
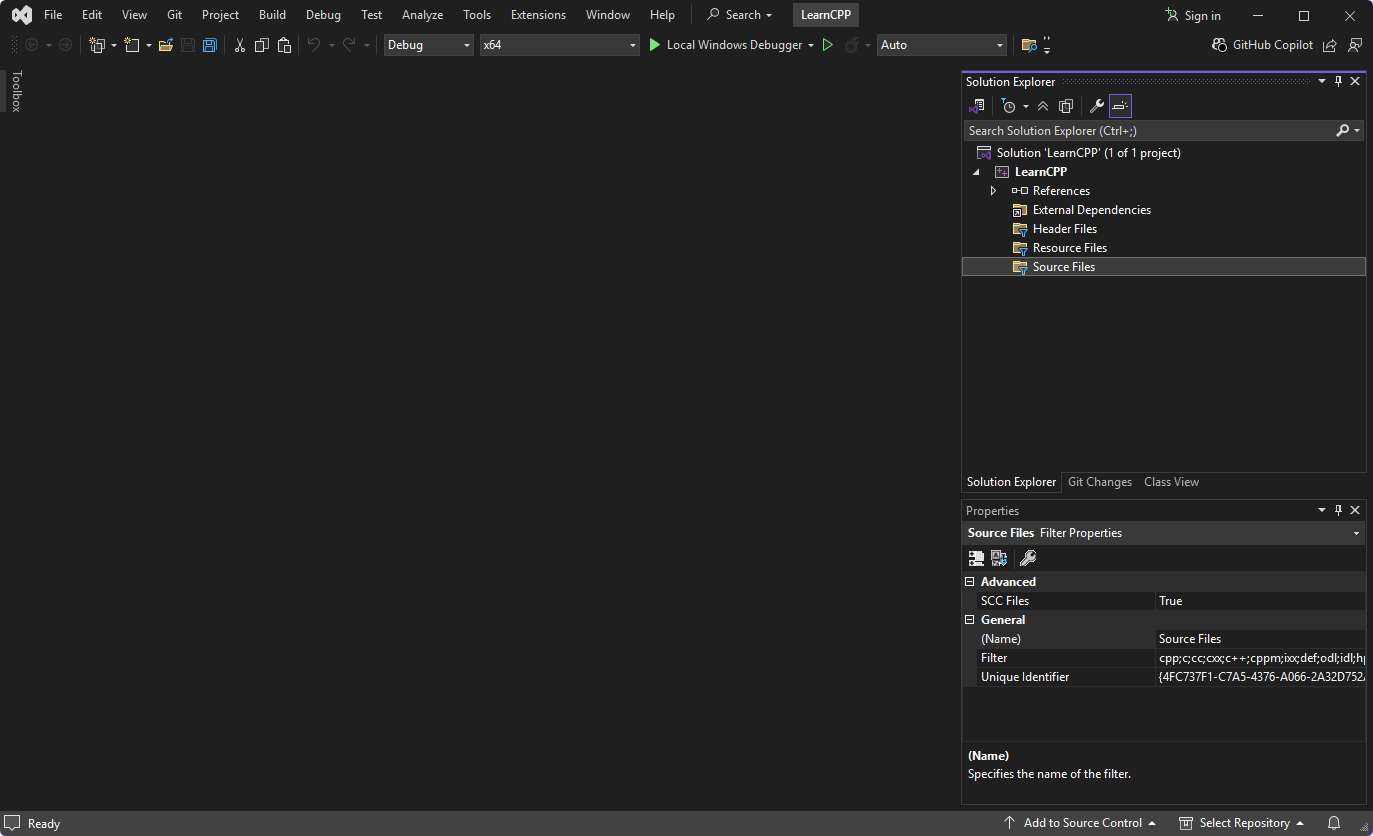
You should now see an empty screen with the "Solution Explorer" on either side of your screen. Right click on the "Source Files" and add a new file named "main.cpp". You are now ready to write Your First Program.
Getting Started with C
INFO
TODO: Add documentation for C
Running Your Program
Once you've written your first program, click "Local Windows Debugger" at the top of your screen. You can also use the F5 key on your keyboard. Visual Studio will automatically build your program for you when you run your program. You can build your program without running it by pressing the "Build Solution" or "Build <Project Name>" menu items in the "Build" menu bar item.