Setting Up CLion
CLion is a commercial IDE from JetBrains. You can download CLion here.
INFO
CLion is now free for non-commercial use!
During installation, tick the "Add bin folder to PATH" and "Add Open Folder as Project" options. After completing the installation, you should be prompted to log into your JetBrains account.
If this doesn't happen, you can log in from the menu later after creating a project: Help -> Register...
Installing a Compiler
CLion ships with MinGW GCC on Windows.
INFO
If you want to install MSVC, use the Visual Studio Installer to install it. You will be able to use MSVC from CLion.
Getting Started
After you installed and activated CLion with your JetBrains account, you should see this page:

Click "New Project". Select C++ Executable, name your project and select a C++ standard (or select "C Executable" if you want to use C). C++23 is a good choice (or C23 for C) if you don't know what to use.
The next thing you will see is this:
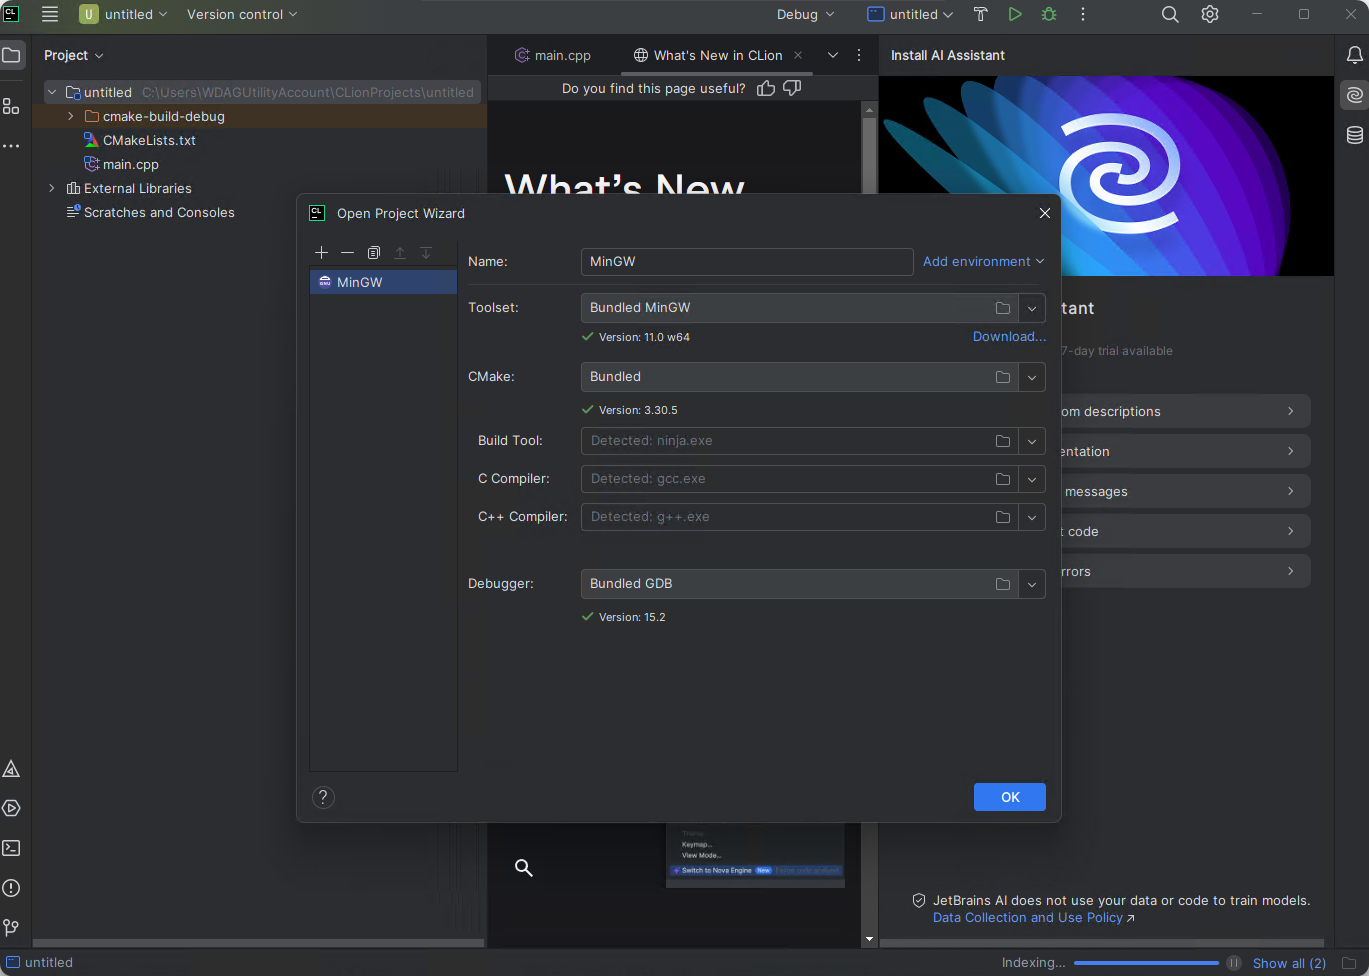
INFO
If you have other toolchains, such as MSVC, installed, they will appear here.
Running Your Program
CLion will automatically create a source file named main.cpp for you with a Hello World program.
Try and see if your setup works by pressing the green play button or press Shift + F10. A terminal should pop up at the bottom that says "Hello, World!".
INFO
CLion uses a build system called CMake. You can edit your build configuration in a file called CMakeLists.txt. This tutorial will not go into CMake, you can read our CMake article for more information.